We painted stripes, again.
Remember awhile back when I mentioned we had plans to (finally) design our home office? Well… it’s happening! Actually, it happened! We are in the ‘styling & decorating’ phase of this fun little project and I can’t wait to show you the entire project!! You are going to love it (hopefully)! But for now… I am only showing you the accent wall phase…
I showed you our inspiration pictures for the office, our to-do list, design board & shopping list already. The funny thing is, we have stuck really close to everything we had jotted down in those two posts… except… the wall color. Our original intent was to either keep it all white for a clean crisp look, or a light neutral. Boy oh boy did that idea change.
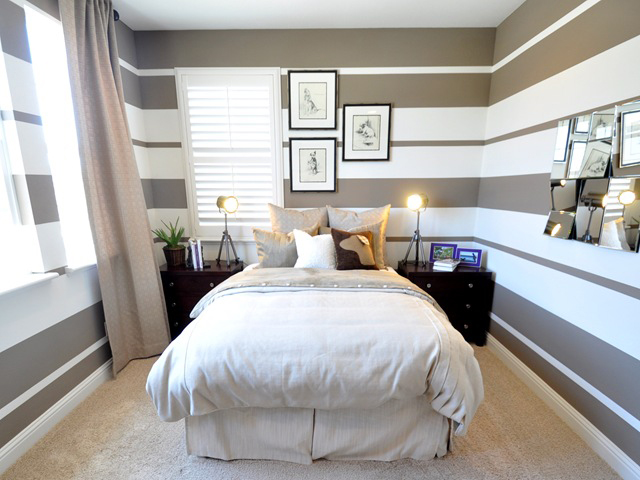
It all happened one night when I thought it might be fun to get a little bold in our office. Everything in our home is whites, aquas and neutrals. I thought it might be fun to venture out a little and get ‘crazy’. I came across this picture and fell in love….
(source via Centsational Girl)
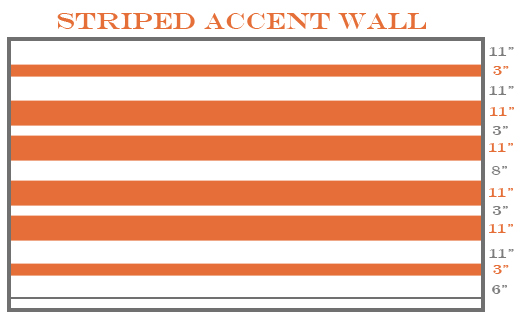
You read from our design board idea, that Kevin has a ton of Gator memorabilia from his days at UF. They aren’t my favorite things in the world, but I wanted to compromise since we share our office. The idea of incorporating a fun striped accent wall and going a little more bold was growing more appealing by the minute. We started thinking of our office as a place to come up with new ideas, work, concentrate and even have fun in. It’s been no secret how much I love the stripes in our living room… except those stripes were symmetrical and this time we were going a bit more random with the approach (like above). Instead of painting our entire office, we decided on a accent wall. (You can find the math for the symmetrical stripes here). Here’s how we did the math for our office wall…
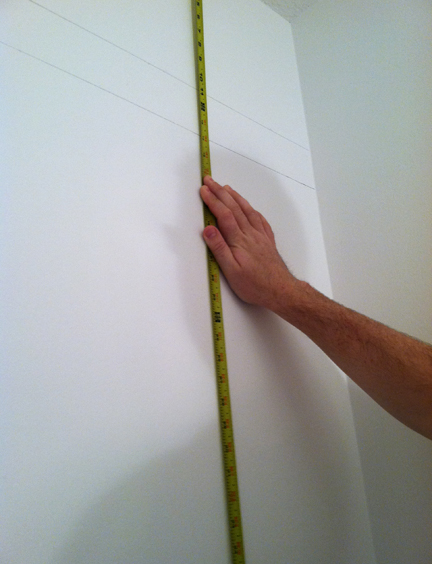
Our entire wall is 103 inches tall (minus the baseboard because that was going to remain white). We wanted the random look, but still have symmetry within that (like the inspiration photo). What can I say, we like symmetry! So, for the stripes to be somewhat even starting from the middle and working their way to top and bottom, we needed to figure out how many stripes we wanted and how wide we wanted them to be.
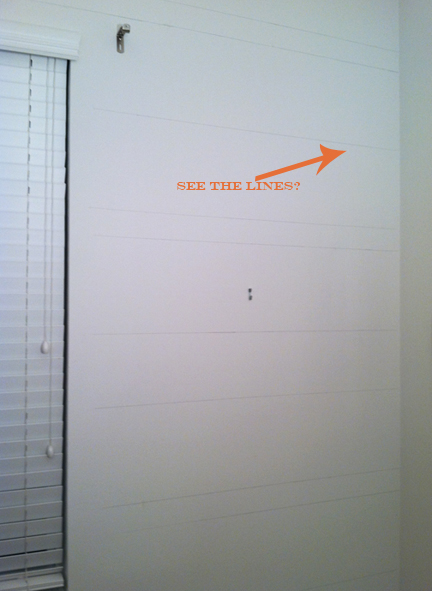
(These are low quality iphone photos… but they will do the trick)
Much like our stripes in the living room, after the math is figured out, then you just measure, mark it & then tape. To create super straight lines all the way across your wall, just grab a level and a pencil and draw a light line from mark to mark using the level as a guide. This is the most time consuming part of the striping process!
Then to figure out which side of the line you need to tape, draw a light x on the areas that are to be painted. From there, you just tape (using an edge lock tape– we use Scotch Blue’s) on the outside of the line for the stripes we would be painting, but inside the marks in the negative space that we wouldn’t be painting. Make sure to press on the edge firmly going down the entire wall to make sure you don’t have paint ‘bleeding’.
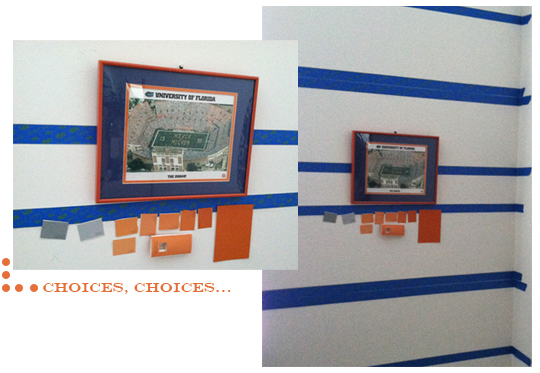
After the stripes were a ‘go’, we just had to figure out the right color. (We were a little backwards on this part of the project.. oh well). It was between a nice slate blue/gray and orange. Friends, orange and I have a love, hate relationship. I can’t even believe that it would strike me to paint stripes orange in our home. It’s still shocks me to say it out loud.
We pinned up the samples and sat back for a bit and took them all in… (such awful iphone pics…)
We picked off the samples one by one until there were only 2 left… The slate blue color and one orange shade. Holy moly, I picked the orange and off Kevin went to to pick up a gallon. I of course sat in our office wondering if I had made the right decision. I usually never, ever freak out about selecting things for our house, but this time I did! (The color we picked: Sherwin Williams # 6649 tango).
Kevin is the paint roller in our house and I am the cut in gal. In just about 30 minutes, we had the entire wall painted and done! We painted the stripes and waited. Seeing the orange stripes up against the blue tape had us both thinking we hated the orange.
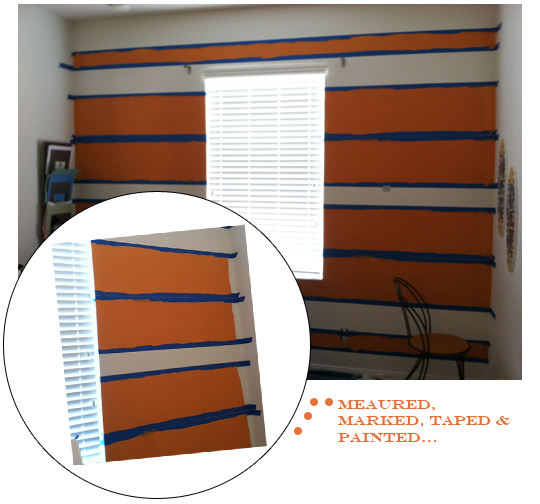 We allowed the paint to dry before removing the tape (never take it off when it’s still wet, contrary to belief, it creates an imperfect edge on the stripes). Once we removed the tape we were feeling so much better. We weren’t ‘in love’ or anything, but when you go bold sometimes you just need to sit on it for awhile! By the next day we were feeling so much more confident about our decision to go orange! We were looking at en empty room and envisioning our white desks with stained tops nearly ready and we were growing super excited…
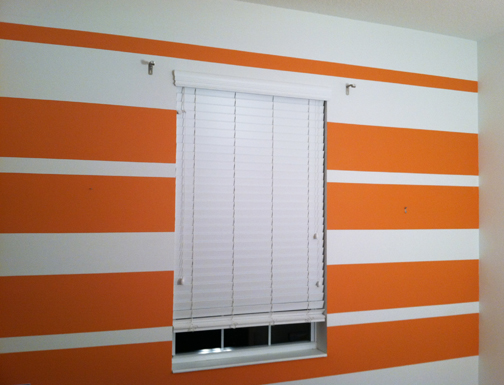
Here’s a sneak peek shot of the accent wall all done…
Kinda fun right??? It was kinda funny timing because right after we painted this, we got a West Elm catalog (the one dated to be delivered between 1/30- 2/1)… We must have been on the same wave length…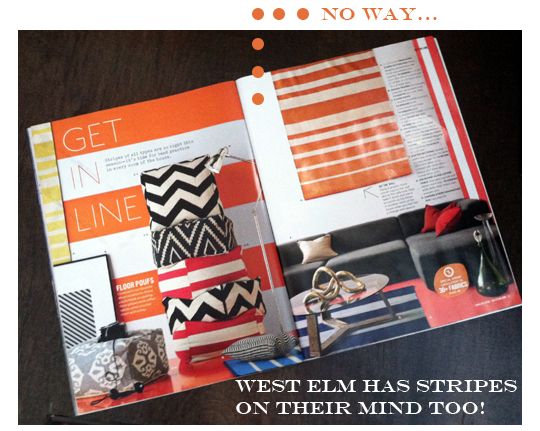
How funny? West Elm says stripes of all types are in this season!! Plus, orange/tangerine is Pantone’s color of the year… who knew we could be so trendy!?! Actually, in all honesty, we picked orange solely because it was a great color for compromise, it promotes energy, excitement and also has been known to help in productivity in the workplace. For more information on other colors.. I have a blog post all about color & effects!
Now… here’s where we are on the office to-do list:
– Break down old desks & sell (or give away)
– Select wall color, prep & paint
– Figure out the best configuration for our desk layout
– Select desk bases (cabinets)
– Pick out materials for desk tops (wood, stain, trim)
– Put together desk bases
– Cut desk tops, stain & add trim detail
– Put desks together
– Buy new chairs
– Put our office back into a functional, working order
– Style, Decorate & Accessorize!
Stay tuned for the next phase… Hopefully you will L-O-V-E our office as much as we do!!
What projects are you guys up to these days? Going bold in any way? Reaching outside of your comfort zones? DO TELL. In fact, if you have a going bold project, send me the results @ lindsay@adesignstory.com and get featured! So… about our stripes… what do ya think?
(p.s…. we have a TON of new projects coming at you… plus the as promised new schedule… I have been under the weather, but hopefully coming out of it)
I love it! And I love that you used different sizes of stripes too…looking forward to seeing the whole thing come together!
Thanks Abi!! I can’t wait to finish it up this week so I can reveal the “big picture”! Thanks for stopping by!
Lindsay,
Wow, the room looks great! I have a painting tool you and your readers would love if they liked what you did. There are no pencil marks, rulers, levels, etc required. You only use this tool called the U-Stripe It & Design Tool and Delicate painters tape. Using this tool your readers will be able to do the same design in hours. Check it out at http://www.ustripeit.com. My dad, who had been a painter for over 30 years invented it to make his job easier and it worked. The best part about the tool, anyone can use it, the everyday person, with ease. Thanks and the room looks awesome.