As an interior designer, I have a strong love of classic & new furniture that is already beautiful. With every project I have ever designed, I have been able to use some of my favorite designer pieces.
That being said, I do know what pieces you should spend a little more money on for quality, and which pieces you can make “new” and “beautiful” with a little Do It Yourself Know-How! The trick is having the “eye” to see something in a thrift store, garage sale or craigslist for the architectural shape, style or even the foundation.
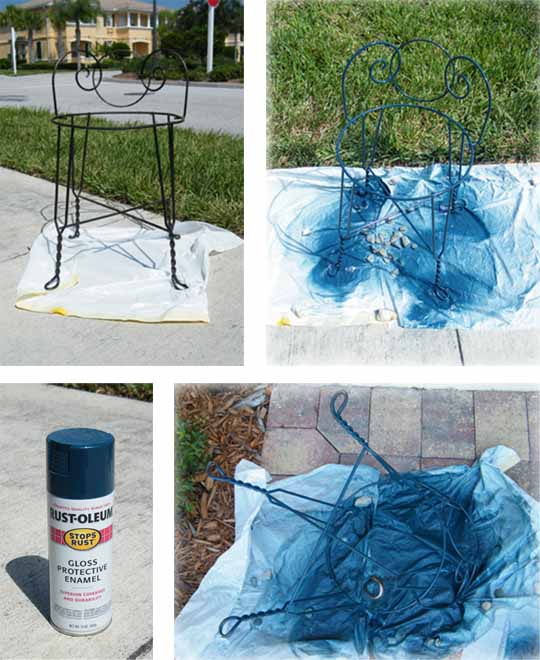
For example, I was recently in my Goodwill and spotted this.
It is a bit rusty, outdated and in need of a little DIY Help! For $3 it was mine. I loved it for the shape… it sold me on that alone. I ran over the Lowes grabbed me a can of the deepest turquoise they had and took it home to “make it mine”. The plan was to put it in our master bathroom beside our tub to place a towel on, for me to use to dry my hair (yes, I have to sit down to dry my hair) and to look cute!
First I took the seat off by unscrewing the bottom of the seat from the frame. Next I wiped down the entire frame to make sure it was free of dust and dirt (which can make your spray paint bubble and crack).
Next, I sprayed the entire surface. Too keep my spray paint from dripping, I always spray at least 5-10” away. Keep in mind not to spray paint on windy days… most of the spray paint goes elsewhere! I let it dry for the night. Then I turned it over and gave it the last coat.
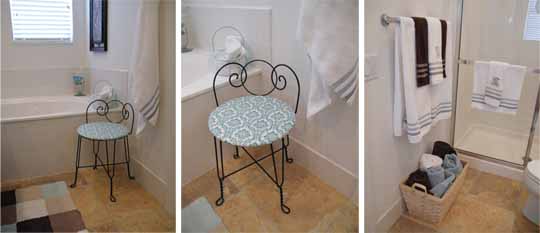
While that was drying, I re-purposed the seat! Since the seat itself was really thin, I decided against using the staple gun (it might just go through it entirely). I pulled out my hot glue gun, grabbed my fabric (which is outdoor fabric since it’s going to be in the bathroom) and got to work! I first cut my fabric around the seat, making sure the pattern would be centered perfectly. I hot glued the edges to the bottom of the seat and left it to dry.
Next, I screwed the seat back to the frame and ta-daah! We love it because it functional and correlates well with our master suite décor… plus it was only $6 total (with the chair and materials).
So, remember back in this post, now it’s moved… the towels are near the shower (which makes more sense) and the chair resides next to the tub. Loving it!
You have seen bunches of DIY Projects and Thrift Store Shopping posts on A Design Story. This week I am going to lay out some designer tips on which pieces you should spend the most on in your home and which ones you can skimp on! Plus, we are going to have a handy dandy new page coming featuring DIY Guides, Interior Design Tips & Tricks and a Designer How-To Guide… so stay tuned!
So, what do you think? DO TELL! Have you recently taken on a DIY Project, come and show us! We would love to feature you! Email me @ Lindsay@adesignstory.com for more details!
Also… sign up to enter this week’s Gracious Giveaway and get your chance to win a luxurious pillow cover!
I added this post to Thrifty Decor Chicks Party, House of Grace,


Such a fun and easy little makeover, Lindsay. Plus, it’s perfect for even the smallest of bathrooms. Thanks for sharing!
adorable! 🙂
Love going to the Goodwill!!! Can’t wait to do more of it! Enjoy that cute little seat. It turned out great!
Love goodwill and finding goodies! I strongly suggest going to estate sales on Saturday mornings, because they can be quite the treasure trove. Also, I loved seeing your sweet face on the NB show! You got quite a bit of air time!
XO,
Sara Kate
its soo cute… i wish i had the same eye as you do for turning ugly into awesome!
un lavoro bellissimo!
complimenti;)