Linear Love… How to Paint Stripes on Walls
“Though there are moments when plain white walls might seem a relief, those moments are rare, and should be discouraged.” ~Roger Banks
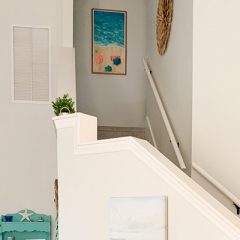
We are ready to reveal our living room… Remember a few weeks ago when I mentioned that we were ready to say Goodbye to our White Walls and say Hello to Color? No, well click here and check it out or just refresh your memory!
Well we decided to get stripey with it! That’s right; we painted wide, horizontal stripes as an accent wall in our living room. Whether they evoke shady poolside lounges, chic nautical fashion, or big, soft towels, stripes are far and away the beachiest pattern out there. We couldn’t say no to some big cabana stripes!! So here’s a little DIY Tutorial on Designing with Stripes!
One more last look at the before…

Here is a step-by-step guide on How to Paint Stripes on Walls:
Step 1: We engineered our layout: Decide a pattern that best fits your style and space (how many stripes you want). Since we have a beachier, casual style, we opted for wider stripes. It is all mathematical now …we measured the full length of our wall and divided that number by twice the number of stripes that we wanted to have minus one (ex: our ceiling is 91″ tall and we wanted five horizontal stripes (in the new color) so we (and by we I mean Kevin) divided 91 by 11 (5 x 2 = 10+ 1 = 11) to get the thickness of each stripe. Each stripe would come out to be about 8.27 inches. We added 1 to 10 because we wanted our top and bottom stripes to both be white (If you didn’t you would minus 1).
Step 2: Fill it: We decided to keep the white on the wall and only add a soft tan as the stripes. If you plan to have two colors, be sure paint your first wall color (this should be the lightest color) and leave it to dry completely.
Step 3: Mark it: (Make sure the first color is dry before any other steps are completed). We used a ruler and marked off every 8.27 inches starting from the floor and working our way up to the ceiling (we made two small pencil marks on each side of the wall). We then used a level to join the marks with a light pencil line.
Step4: Tape It: The key to a successful striping job is the tape! We grabbed some blue painter’s tape and joined our pencil markings to form taped off stripes (once the tape is in place make sure that the tape is nice and secure on the wall to prevent the paint from bleeding). We placed the tape outside the marks for the stripes we would be painting (the 8.25 inches), but inside the marks in the negative space that we wouldn’t be painting. Although after the taping was complete, it looked like the stripes weren’t the same size, we had to account for the width of the tape itself. So, keep that in mind if you decide to get stripey with us!

Step 5: Roll it: Next, we snatched a good roller and our paint… We then grabbed a brush a put a little spot on the stripes that were to be painted, that way we didn’t get confused! We applied two even and thin coats of our paint between the tape that was further apart to create our loving stripes. Kevin is usually the roller and I am the cut-in gal. I am better at the details and he is a rocker at rolling!

Step 5: Pull the tape off: This is a very important step. We waited until our wall was completely dry; then we began pulling the tape off the wall. It is essential to pull the tape off at an angle and slowly! A lot of people advise pulling the tape off when the wall is still wet; this is an incorrect suggestion as it can create a mess with the wet paint and wet tape. It truly is better to wait until the wall is dry and the remnant paint of the tape is too!
Ta-dah…


We were trying to be subtle with this look, so I selected a light tan, Behr’s Raffia Cream in a eggshell finish. It really gives a softened layered look, especially since we chose a different sheen than the flat that’s already on the wall.
Are you looking to add more character and drama to your space? Painting horizontal or vertical stripes is a relatively easy project that requires few tools and virtually no expertise! Much like color, the direction the stripes flow in a room has direct effects on our minds. Horizontal lines create a feeling of calmness, relaxation and even strength. Vertical lines accomplish a feeling of height, strength and dignity. For a feeling of movement and liveliness, diagonal stripes provide a great sense of motion and boldness.
They key to a successful design is selecting a color palette and pattern that directly reflects the type of space you are striving for. Varying color, width, and pattern of stripes makes a space look lively yet balanced. Remember the number of stripes you paint will either create a more calming space or a more energizing one. For example, if you want a more casual, relaxing environment you would want to select a tone-on-tone color palette and wider stripes. Incorporating stripes to the foundation of the room (the walls) will modernize your space and make a remarkable impression!
We made it and we love our new linear look. So, let’s hear it, what do you all think? Do you have any stories on stripes? Do tell.
Don’t forget to come back… we still have both our Master Bedroom & Guest Room to reveal!
For more design inspiration, subscribe here. Love design? Join the community and start chatting!
All images courtesy of A Design Story, LLC.
Want to see other fun DIY’s~ Visit House of Hepworths, The Shabby Chic Cottage, DIY Showoff, Some What Simple, A Soft Place to Land, Domestically Speaking &Thrifty Decor Chick.

Love it!! Love it!! Great job!!
That is really neat!!
You all did a wonderful job in that!!
That mist have taken a lot of work.
Thank you Beth~ It was a little time consuming, but well worth the effort!
Looks great Linnyloo!! Love your place!!
It looks great! I just moved into a new apartment last week and can’t wait to start painting. As usual your post gives me tons of ideas.
Thanks!
Melissa
Love the stripes in the two different finishes! Lots of oomph for your space especially with your dark accessories. Lovely!
Lindsay–I love it! It looks so good!
gurl, these stripes ROCK!!!
oh my gosh, it’s such great visual interest and i adore it!
bravo, chick! xo – CasCullen
Thank you… I am just loving it too! My husband said it was worth the effort… so that was exciting 😉
What a HUGE difference… I always love a classic stripe. Thanks for joining the POPP!
I love it! Thanks for posting this. I am a renter and my husband said DEFINATELY NOT on the board and batten idea for my dining area. This is a very do-able solution!
Homesteader~ Absolutely, I am glad I could help inspire a new idea! Good luck and come back and let us know how it goes!!
I love it! I totally want to do this, but I dont have the guts. I have had so many bad experiences with blue painters tape. I recently went to frog tape, but even that has failed me. I want to redo our spare bedroom with whites and a light airy green. (its brick red and tan right now!) but again… guts. Lol!
Yours turned out fabulously! Maybe you want to come to MN and do mine for me! Lol!
Em
Thank you Emily~ it was hard work, but it paid off! We love it!! I can’t wait to do some other walls with creative designs! They actually came out with tape that has better edges… it works so well! I pulled the tape off and the lines were perfect!
I would love to come and do your wall 😉
I love this!! I did almost the exact colors as yours. Only between the two colors I put a white strip in. Great job, it looks wonderful!
Hi Heather…. I would love to see your stripes…